

This is a technical tutorial for owners of the Monoprice Ultimate 2 FDM 3d printer. Since the material is quite complex it may seem confusing or overwhelming to folks that are not owners of the 3d printer and are unable to follow along.
After reading this tutorial please provide your feedback on the new DrVax discussion forum. Just click the forum image below:

The Monoprice Ultimate 2, and also the Monoprice Cadet both come with masking tape on the print surface. These printers are made by Weedo and in the case of the Cadet, this makes sense as the Cadet does not have a heated bed. Both printers have a glass surface under the masking tape and on my Ultimate 2, I have removed the masking tape and just use a very think coating of MagiGoo on the bed. This works perfectly for me if the bed is properly leveled.
The Ultimate 2 as an auto bed leveling system that has worked well for me. However, some of my viewers have had difficulty and I believe it may be because their printers came from the factory with a bed that was too far out of alignment for the ABL system to succeed. I have seen this with other 3d printers from other manufacturers and there is an easy fit.
I am using version 2.2.8 of the firmware which I obtained from the Monoprice website. If you are using a different version of the firmware I the front panel photos in this tutorial may not match.
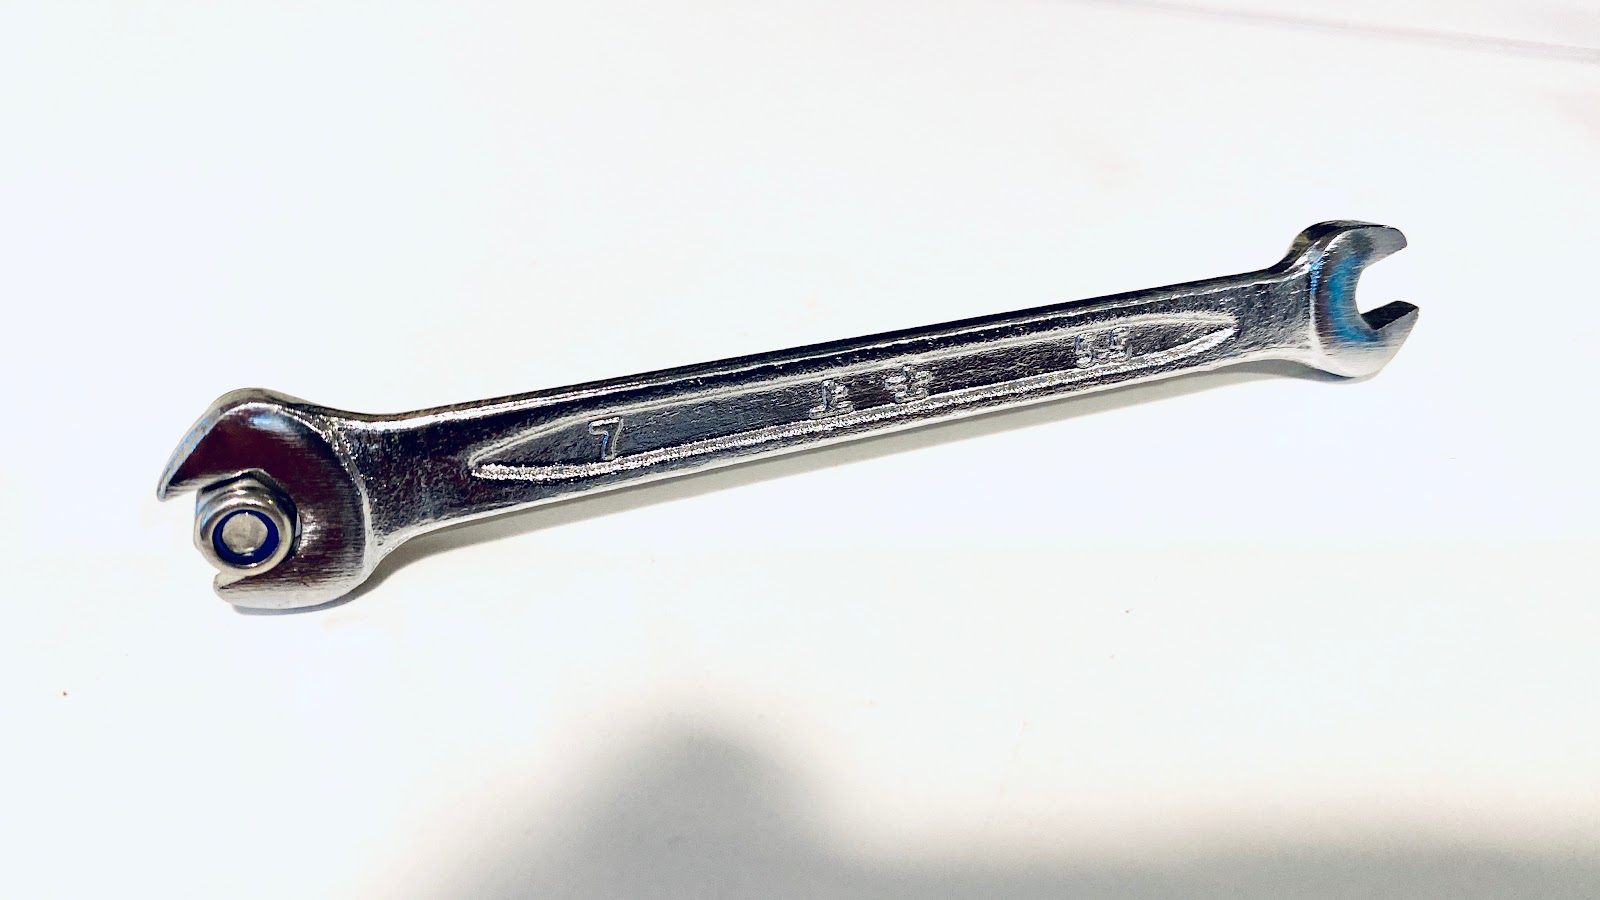
You will need a 5.5mm spanner or socket driver to complete this procedure. I believe one came with my printer along with a couple of extra bed bolts. I did check and Amazon carries 5.5mm socket drivers.
Step by Step Monoprice Ultimate 2 Tutorial
1) Before starting heat up your nozzle and make sure there is no extra melted filament stuck to the end of the nozzle. If there is, clean it off with something nonmetallic, as you do not want to damage the brass nozzle. I use popsicle sticks.
2) Select Prepare and then Level Bed. This will move the hot end to each of the corners of the print surface and then to the middle. In my case, I noticed the printer nozzle was a bit higher than I would set it if manually leveling a print bed. To get the proper distance I used an index card between the nozzle and the bed.
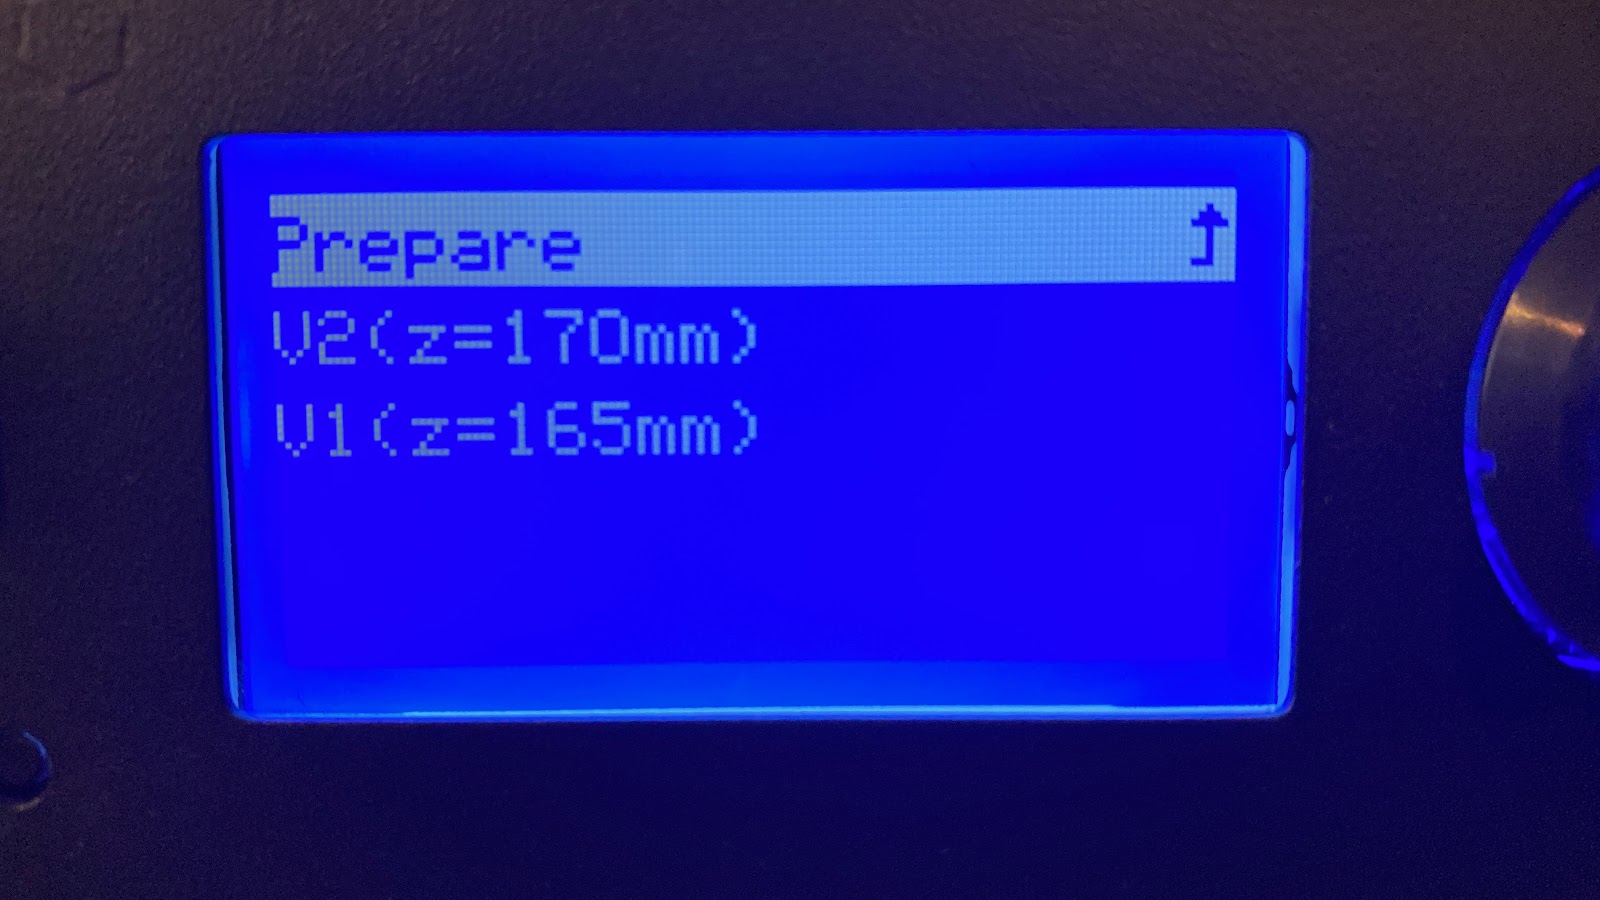
3) The firmware will present an option for V1 or V2. To see the V1 vs V2 option you need to turn the knob. If you are unsure select V1. The V2 option moves the print head closer to the bed by 5mm which will be too close if you get it wrong. When you select V1 if the print head is more than 5mm from the print bed, go back and select V2.
4) There are four 5.5mm nuts under the print bed that you use to adjust the height of the bed. When you tighten the spring by pulling the bed down, you are lowering the print surface. Here is a photo of one of the nuts:

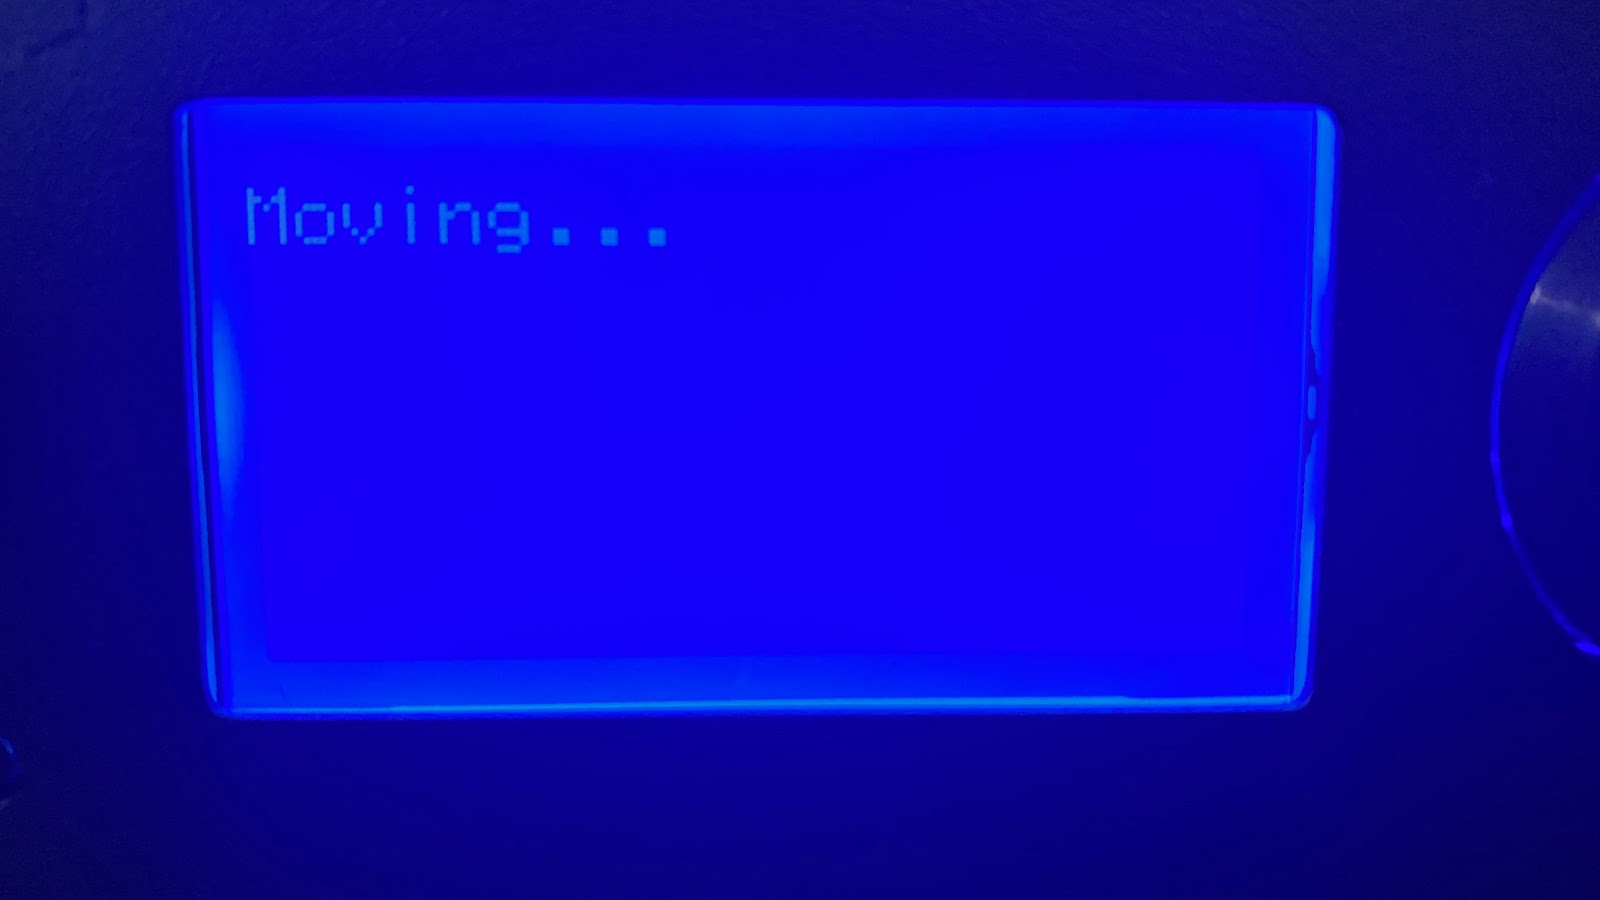
5) When you select Level Bed, depending on your firmware version, the front panel will remain frozen with a message saying "moving". Just put click once (press in the knob) and the bed level procedure will continue and move the print head to the first position, which on my printer was the back right corner.
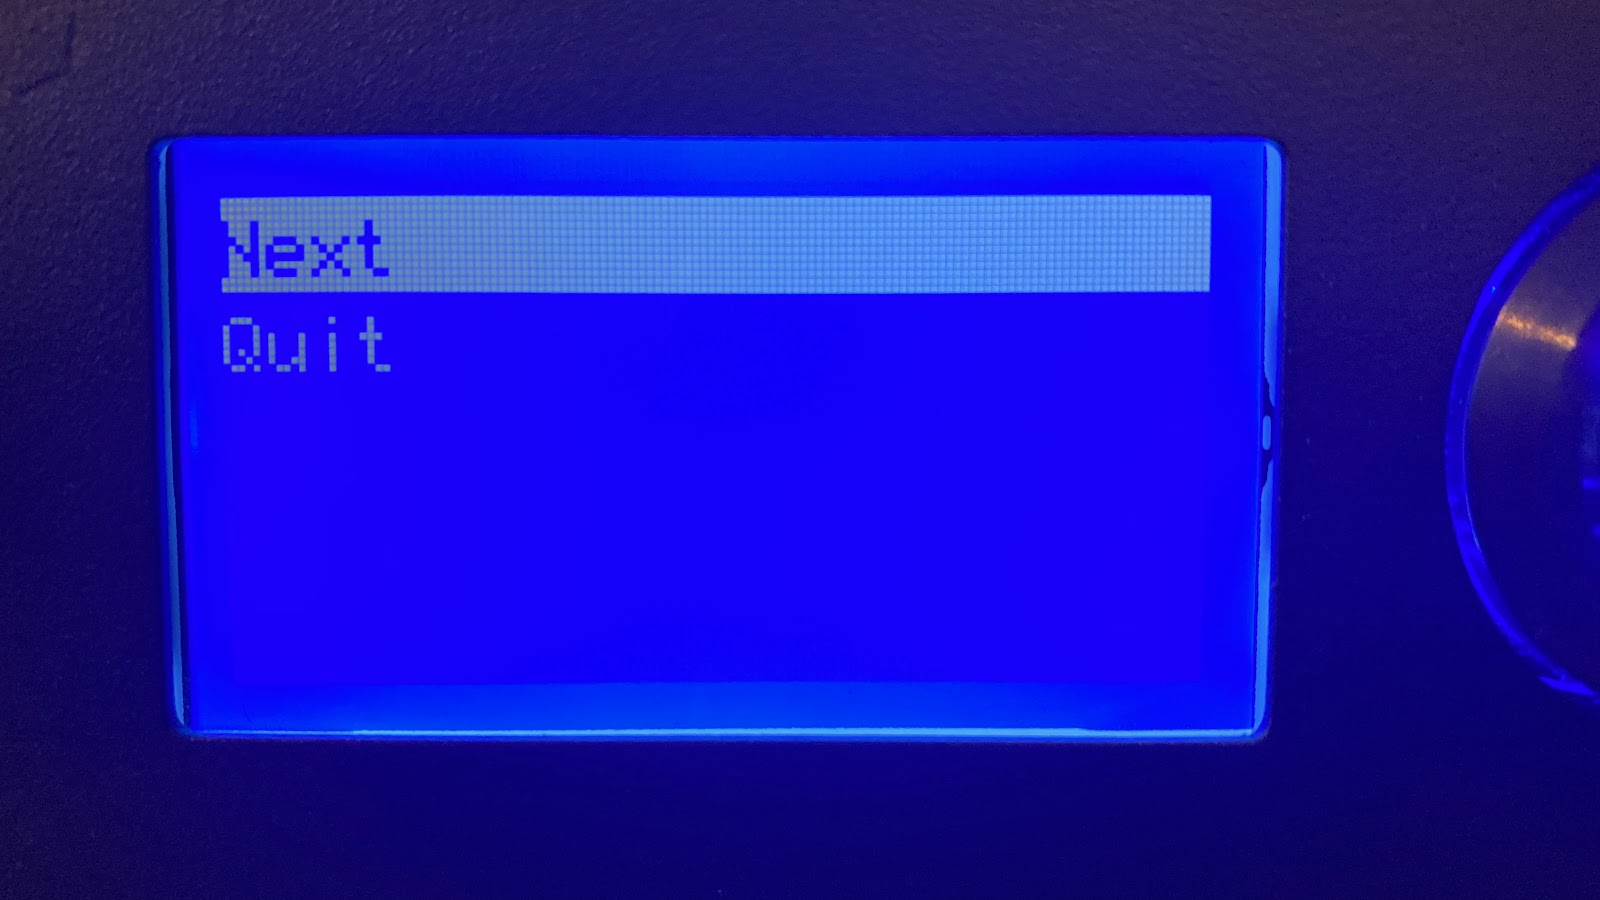
6) Put an index card below the print head and adjust the bed level nut (bolt) so you have a slight bit of friction when moving the card. Once you have adjusted the current corner click on next to move to the next corner.
7) After adjusting all of the corners, and you may want to do this multiple times, now you have to adjust the Z offset in the center of the print bed. From the main menu select Control and the Z Offset Setting.

8) Now the printer head will home, and then do a 3 point auto bed level test. You will see the red light illuminate on the ABL sensor. Then the print head will move to the center of the bed.
Place a post-it note or a piece of regular paper under the print head and then adjust the Z offset by turning the knob so there is friction on the paper when attempting to move it. You do not want the paper to move freely.
9) After adjusting the Z offset and returning to the main menu with a click, you are ready to print a test print. During the test print, which should be from the SD card, you can access the "tune" menu. Scroll down until you see the option to adjust the Z offset.
10) While the print is printing, attempt to "rub" the lines off of the platform. If you can easily rub off a line the print head is too high. If the lines do not print, the print head is too low.
I print directly on the glass without the masking tape but with a bit of MagicGoo. If you apply the MagiGoo unevenly or you have the print bed temperature too high you will see some defects in the bottom of your print. Some people prefer the masking tape surface on the bottom of your print, it is a matter of personal preference.

Please leave comments at http://forum.drvax.com about your experiences with the Monoprice Ultimate 2 printer.

